
In this second instalment of our Kylix Open Edition tutorial series, Brian Long develops a text editor application.
This article first appeared in Linux Format Issue 20, November 2001.
Click here to download the files associated with this article.
If you find this article useful then please consider making a donation. It will be appreciated however big or small it might be and will encourage Brian to continue researching and writing about interesting subjects in the future.
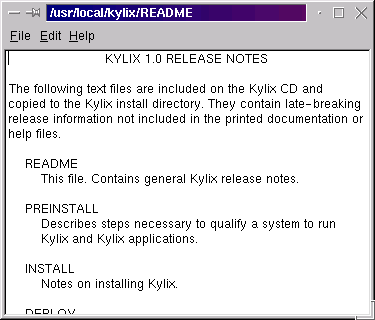
Last month we saw how to install Kylix onto (at least supported) Linux distros, and what the key parts of the IDE were. This time we will look at how to build the text editor application we left you with last time (see Figure 1).
Figure 1: What the pre-installation test program says on a suitable distro
The first thing to do is to start Kylix Open edition or, if it's already running, start a fresh project (File | New Application). This creates a framework for an application with a single form, which is all we need here. Before proceeding we should save our project, and we should regularly save changes from this point on (to avoid losing much of your work due to unexpected power failures or crashes).
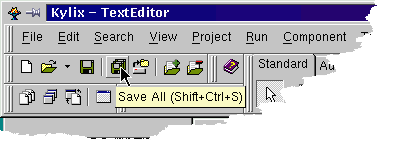
The files that make up a Kylix project are described in the Kylix Project Files section. To save your project, choose File | Save All (or choose the corresponding toolbutton, visible in Figure 2). This will prompt you first for a name for the form unit (the one supplied is called TextEditorU.pas) and then for the project file itself (called TextEditor.dpr in the supplied files).
Figure 2: The toolbutton for saving all pending changes
Note that despite the project file and unit having different extensions, it is vital that their names be different. Our convention for single-form projects like this one, is to choose a name for the project (which will become the name of the resultant executable), and give the unit the same name but with a letter U suffix.
The form object is currently called Form1 (and is of type TForm1), which is not a very descriptive name. Change its name (using the Name property on the Object Inspector) to frmTextEditor, remembering to press Enter after typing the new Name to ensure it is applied to the property. You should try and remember to press Enter after typing in any new property in Kylix 1 as otherwise there is a risk that the property value will be ignored.
Now we need to place the required components onto the form. From the Standard page of the Component Palette, you need a TMemo component (that's a component whose class name is TMemo, but the tooltip given by the Component Palette when you hold your mouse over the correct component will say Memo - the class name without the leading T). Change its Name property from Memo1 to memText.
The mem prefix is used to indicate that memText is a memo component, and the frm prefix used for the form's name indicates frmTextEditor is a form. These are examples of a common component-naming convention, a small group of letters selected from the object's type used as a prefix.
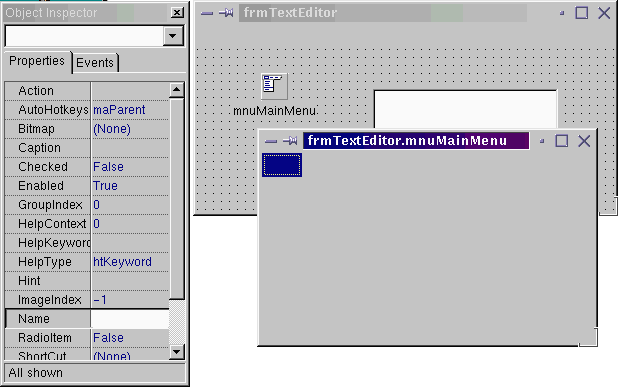
From the same Component Palette page get a TMainMenu (whose tooltip will say MainMenu) and change its name to mnuMainMenu. There is a notable difference between the memo and the menu (other than that they do very different jobs). The memo is a visual component. You see its visual representation on the Form Designer and you also see it at run-time. The main menu component is a non-visual component, and so the Form Designer uses the same image to represent it as the Component Palette (see Figure 3), allowing you to select the component at design-time. At run-time this image will not be visible, but hopefully the actual menu represented by the component will be on show.
In order for this menu component to act as the form's main menu (be displayed across the top of the form) it needs to be connected to the form's Menu property. Conveniently, this has happened automatically, thanks to this being the only menu component on the form (you can verify this by selecting the form object by clicking on the Form Designer's background and checking the Menu property on the Object Inspector). In other words, as we build up the menu component (as we will do later), we will automatically see the menu appear at the top of the form.
Figure 3: A non-visual menu component

We now need a couple more components, this time from the Dialogs page of the Component Palette. Place a TOpenDialog and a TSaveDialog component (both non-visual) on the Form Designer. These will be used to choose files to open and new names of files being saved, respectively. Change their Name properties to dlgOpen and dlgSave.
There are no more visual controls required on the form so the memo can be made to occupy all available space on the form (which is the memo's parent control) by setting its Align property to alClient. This tells it to occupy all available "client area" of its parent, after taking into account any other child controls which are aligned to one of the parent's edges).
Also the memo, like many controls, defaults to displaying its name as its textual content (as shown in Figure 3), so we can improve on this using its Lines property. Lines is a property that is implemented as a TStrings object - an object designed to manage a number of textual strings. This object manages the memo content, so invoke its property editor by pressing the ellipsis button (the button with three dots on it) or by pressing Ctrl+Enter, and clear out all the text. This now leaves the memo empty.
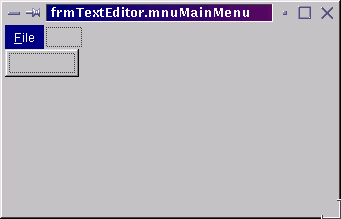
The last thing to do with the user interface of this program is to build up the menu. Once that is done we can consider how the program will actually work. You build menus in the Menu Designer (see Figure 4). This can be invoked either by double-clicking the component, or right-clicking on it and choosing Menu Designer from the context menu, or by selecting the component, then invoking the property editor for the Items property (select the property on the Object Inspector and press the ellipsis button or Ctrl+Enter).
Figure 4: An empty menu in the Menu Designer
To start with the Menu Designer is empty, which is fair enough. However, a potential menu item is highlighted, and the properties of this incomplete TMenuItem component are on display in the Object Inspector. By entering one or more properties we can make the TMenuItem component be made real and complete. Set Caption to &File, for a typical file menu, and set its Name to be mniFile. Incidentally, the & in the caption makes the following letter underlined when drawn in the menu, meaning the user can drop the File menu by pressing Alt+F.
Now click back on the representation of this File menu in the Menu Designer, and you should see two other potential menu items waiting to be set up. One is another item on the menu bar next to File, whereas the other is a menu item within the File menu (see Figure 5). Click on the item below File and set its Caption to &New, its Name to mniNew and its ShortCut to Ctrl+N, meaning that Ctrl+N will directly invoke this menu item's behaviour without having to touch the menus at all.
Figure 5: One menu item down, several to go
Continue adding more menu items to the File menu, choosing the Name, Caption and ShortCut properties as shown in the following list. Note that for the last menu item in the list, the short cut must be entered character by character, as it is not in the Object Inspector's list. Also note that the three dots at the end of the open menu item's caption indicates to the user that a dialog will appear should they choose that item.
Name = mniOpen,      Caption = '&Open...', ShortCut = Ctrl+O
Name = mniSave,      Caption = '&Save',    ShortCut = Ctrl+S
Name = mniSeparator, Caption = '-'
Name = mniExit,      Caption = 'E&xit',    ShortCut = Alt+X
Figure 6: The completed File menu
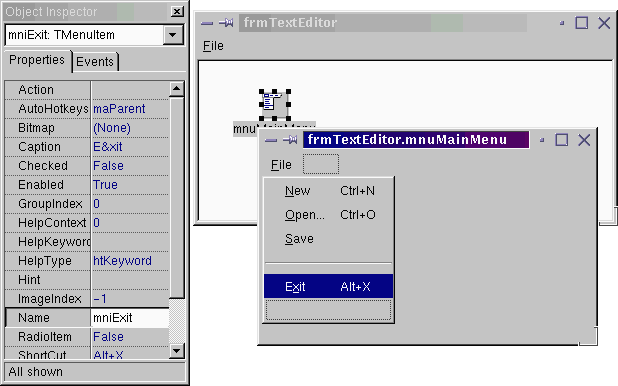
With the File menu complete, you should be looking at something like Figure 6. Now onto the next menus: an Edit menu and a Help menu. Click on the entry next to File in the Menu Designer to make the Edit menu (and then on the entry next to Edit, which will appear at that point, for the Help menu). Set up the menu items as follows:
Name = mniEdit,  Caption = '&Edit'
Name = mniCut,   Caption = 'Cu&t',   ShortCut = Ctrl+X
Name = mniCopy,  Caption = '&Copy',  ShortCut = Ctrl+C
Name = mniPaste, Caption = '&Paste', ShortCut = Ctrl+V
Name = mniHelp,  Caption = '&Help'
Name = mniAbout, Caption = '&About...'
Now that the UI is complete, we can add the functionality that is required by these new menu items. Each menu item has an OnClick event that fires when the menu item is selected. We will write OnClick event handlers for all the appropriate menu items that each contains the required code. You can make an OnClick event handler for a TMenuItem component by using the Object Inspector's Events page, by double-clicking in the right-hand column next to OnClick. You can also double-click the relevant menu item in the Menu Designer.
Let's take the easy ones first, File | Exit and Help | About..., so make OnClick event handlers for both of them. The first one needs to terminate the application. All CLX applications have a main form (by default the first form in the project) and when that form is closed the whole application terminates (as opposed to just that form closing). We can take advantage of this by calling the main form's Close method, which will in turn close the program. The only form in this project (and which, therefore, is the main form) is frmTextEditor. So to close the application, the menu item event handler could call:
frmTextEditor.Close
But we can do better than that. All these event handlers are designed to customise the behaviour of various components, but they are all implemented as methods of the form class. So all event handlers are automatically in the scope of the form, meaning we can simply write:
Close
In the case of the About menu item, we can display a simple message box, so the two event handlers look like this:
procedure TfrmTextEditor.mniExitClick(Sender: TObject);
begin
  Close
end;

procedure TfrmTextEditor.mniAboutClick(Sender: TObject);
begin
  ShowMessage('Text Editor Application')
end;
Notice that whilst you type in parameters in a parameter list, a helpful tooltip shows you the formal declaration of the arguments (see Figure 7). In this case, it tells us that ShowMessage is overloaded and offers us a choice of passing one or two parameters. This is called the Code Parameters tooltip, and it is automatically invoked when you enter a parameter list by typing an open parenthesis. You can also bring it up any time you want (assuming you are in a parameter list) with Ctrl+Shift+Space.
Figure 7: Code Parameters: a helpful reminder of required arguments

The next easiest menu items are the ones on the Edit menu. Clipboard behaviour is made available by descriptively named methods of the memo control, so the event handlers look like:
procedure TfrmTextEditor.mniCutClick(Sender: TObject);
begin
  memText.CutToClipboard
end;

procedure TfrmTextEditor.mniCopyClick(Sender: TObject);
begin
  memText.CopyToClipboard
end;

procedure TfrmTextEditor.mniPasteClick(Sender: TObject);
begin
  memText.PasteFromClipboard
end;
You will probably notice that as you enter this code, another window pops up as you type in the full stop after the memo's name. This is the Code Completion window that offers to type identifiers for you. Figure 8 shows the PasteFromClipboard method being selected in the Code Completion window - pressing Enter types it in for you. You can invoke Code Completion almost anywhere, not just for accessing methods and properties of components, by pressing Ctrl+Space.
Figure 8: Code Completion: a memory jogger and typing saver in one

All we have left is the New, Open and Save menu items on the File menu. It will be useful to keep track of whether the user has made any changes in the memo, so that we can ask if they want to save when they choose File | New, for example. This will be done using a Boolean flag variable, defined as a data field in the form class. The flag is not needed anywhere outside the form, but it will be needed from within several event handlers, so it makes sense to define it as part of the form.
The same applies to the name of the file being edited. It will be useful to keep track of that as the user opens files. This will also be defined as part of the form class. Currently, the form class is a type definition that looks like this, towards the top of the unit (in the interface section of the unit):
type
  TfrmTextEditor = class(TForm)
    mnuMainMenu: TMainMenu;
    memText: TMemo;
    dlgOpen: TOpenDialog;
    dlgSave: TSaveDialog;
    mniFile: TMenuItem;
    mniNew: TMenuItem;
    ...
    mniAbout: TMenuItem;
    procedure mniExitClick(Sender: TObject);
    ...
    procedure mniPasteClick(Sender: TObject);
  private
    { Private declarations }
  public
    { Public declarations }
  end;
Kylix adds declarations for all components and event handlers at the top of the class. We can add extra data fields, methods or properties in either the private section (if we do not wish code from other forms to gain access to them) or public section (if we do not mind other forms accessing them). Since this is a single form application, it makes little difference which section we choose, so let's arbitrarily add them to the private section of the form class, as:
private
  { Private declarations }
  FModified: Boolean;
  FFileName: WideString;
Note that the F prefix is commonly used to indicate a private data field. Also note that the file name is being stored in a WideString, which is a string made of WideChar characters (Unicode characters), to cater for file names with international characters in. If you only wanted simple characters in a string, you could use type String (or AnsiString, which is an equivalent), which is made up of characters of type Char (or AnsiChar).
When our form (or any object) is created at run-time, all its data fields will be initialised with zero-byte values, so FModified will be initialised to False, and FFileName will be initialised to an empty string (this saves us initialising the fields to those values ourselves).
Whenever the user chooses to open a new file, it would be nice to write the filename on the form's caption bar. If the user makes a new file (which is also implicitly the case when the application starts up), the caption bar could indicate this also. To do this, we can place the required code in a new method defined in the form class, which can then be called from wherever it is needed. For a method that takes a new file name and does something with it, but does not return a value, we can declare a procedure that takes a string parameter (if a value needed to be returned we could declare a function). Extend the private section of the form class like this:
private
  { Private declarations }
  FModified: Boolean;
  FFileName: WideString;
  procedure SetFileName(const FileName: WideString);
This adds a declaration of a procedure method called SetFileName, which takes a WideString argument, referred to as FileName. The const modifier does two things: it ensures the string is passed efficiently and also ensures that the method cannot modify any string passed to it. To implement the method, add this code to the lower part of the unit, where the event handlers can be found (the implementation section of the unit). Setting up a method is therefore a two-step process: declare the method in the class, then implement the method in the implementation section.
procedure TfrmTextEditor.SetFileName(const FileName: WideString);
begin
  FFileName := FileName;
  if Length(FFileName) = 0 then
    Caption := ''
  else
    Caption := FFileName
end;
This stores the passed in filename in the form's private data field, then either
writes the file name if there is one, or else
You can make an OnCreate event handler for the form using the Object Inspector, as usual, or by double-clicking the background of the form designer (if it is not obscured by components, which it is right now). Double-clicking many components will make an event handler for what is considered the default (or best) event for that component. For a button or menu item it is OnClick, for a memo or edit control it is OnChange and for a form it is OnCreate.
To select the form so it can have an event handler created, either use the Object Inspector's instance list (the drop down list at the top) or select the memo on the Form Designer and press Escape. Escape selects the currently selected component's parent control, which is the form in the case of the memo.
procedure TfrmTextEditor.FormCreate(Sender: TObject);
begin
  //Get the form to say we have a new file to start with
  SetFileName(FFileName)
end;
One other housekeeping task we can dispense with right now is to set FModified to True whenever the content of the memo is changed (which requires an OnChange event handler to be made for the memo, possibly by double-clicking it):
procedure TfrmTextEditor.memTextChange(Sender: TObject);
begin
  FModified := True
end;
Now we can move onto the New/Open/Save menu items; let's firstly deal with Save. When the user chooses to save, we must first see if we have a valid file name stored in FFileName (a length of zero means we haven't). If not, we invoke the save dialog (through its Execute method) to allow the user to choose a filename, and assuming they didn't cancel the save dialog (which causes Execute to return False), we can store that filename in the data field. Assuming we now have a valid filename, we can save the memo content to the filename by calling the convenient SaveToFile method of the TStrings object stored in the memo's Lines property.
procedure TfrmTextEditor.mniSaveClick(Sender: TObject);
begin
  if Length(FFileName) = 0 then
    if dlgSave.Execute then
      SetFileName(dlgSave.FileName);
  if Length(FFileName) > 0 then
  begin
    memText.Lines.SaveToFile(FFileName);
    FModified := False
  end
end;
Notice that just like in C/C++, multiple statements can be turned into a single, compound statement (for example to have multiple statements execute if a condition is true), by surrounding them with appropriate markers: begin and end in the case of Delphi's ObjectPascal.
Now, what about when the user wants to make a new, blank document? If there have been any changes to the current one we must offer to save it first. Then, assuming anything needing saving has been saved, we can clear the file name, clear the memo and clear the modified flag. The required event handler will look like this:
procedure TfrmTextEditor.mniNewClick(Sender: TObject);
begin
  if FModified then
    case MessageDlg('Save changes?', mtConfirmation, [mbYes, mbNo, mbCancel], 0) of
      mrYes: mniSaveClick(mniSave);
      mrNo: FModified := False;
      mrCancel: Exit;
    end;
  if not FModified then
  begin
    SetFileName('');
    memText.Clear;
    FModified := False
  end
end;
MessageDlg is used to generate a confirmation dialog with three buttons, as specified in the third parameter, which is a set of enumerated type values. The message box thereby has a Yes, No and Cancel button on it.
If the user presses Yes (causing MessageDlg to return mrYes), the code manually executes the Save menu item's OnClick event handler (which, after all, is implemented as another form method). If the user presses No, we indicate there is nothing to save by setting the modified flag to False. If the user presses Cancel, we exit from the event handler, meaning the old file is left as it is. If the user pressed Yes or No, the code moves down to the next condition: if there are no more changes left to be saved, everything is cleared.
This now leaves the Open menu item. When this is chosen, the open dialog needs to be invoked to get the desired filename. Next, if there are any pending changes in the old file, the user needs to be offered the chance to save them - this is done by triggering the New menu item's OnClick event handler. Assuming the user doesn't indicate they wish to stick with their old, unsaved file, the new file is loaded into the memo's Lines property, the filename is set and the modified flag is cleared again.
procedure TfrmTextEditor.mniOpenClick(Sender: TObject);
begin
  if dlgOpen.Execute then
  begin
    mniNewClick(mniNew);
    if not FModified then
    begin
      memText.Lines.LoadFromFile(dlgOpen.FileName);
      SetFileName(dlgOpen.FileName);
      FModified := False
    end
  end
end;
One last nicety we can add in checks if there are unsaved changes when the program is closed (the main form's OnCloseQuery caters for this situation). The user should be allowed to save any changes, throw them away, or stop the program terminating (in case they need more time to think about what to do). We again make use of the behaviour of the New menu item to get the user prompted for saving, if need be.
procedure TfrmTextEditor.FormCloseQuery(Sender: TObject; var CanClose: Boolean);
begin
  mniNewClick(mniNew);
  if FModified then
    CanClose := False
end;
If the user wishes to cancel the closing of the program, the New menu item even handler leaves FModified set to True, so if that happens, we set the CanClose parameter to False. CanClose is declared with a var modifier, meaning it is a var parameter (pass-by-reference parameter). It defaults to True, meaning the form can close, but if we set it to False, the form stays open.
A Kylix project is made out of a number of files, some of which are very important (and so should not be deleted) and some of which are recreated during the save or compile process. The files are given names based either on the actual project name, or on the source module (or unit, to use the correct term) to which they relate.
When you start Kylix, it uses a default project name of Project1 and a default unit name of Unit1. The project file represents the whole application, whereas the unit typically contains the source code for an individual form. However, a unit can also be made that is unrelated to a form, containing (for example) reusable library code.
Here is a list of the more common files you will see, based on the default Kylix naming scheme:
| File name | Description |
| Project1.dpr | The project source file, accessible with Project | View Source, which contains the code that creates all the default forms and starts the program running. It also contains references to all files considered part of the project, including path information if needed. The historic extension stands for Delphi Project |
| Project1.res | The project resource file, which is unused in Kylix (Delphi uses it for storing the application icon and version information) |
| Project1.kof | The Kylix Options File, which is a textual configuration file maintained and used by the IDE to store settings from the project options dialog |
| Project1.conf | The equivalent of the .kof file for the command-line compiler (dcc). You can readily generate Kylix applications from script files using the command-line tools, e.g.: dcc Project1.dpr |
| Unit1.pas | A Delphi PAScal unit (source module). Every form has an associated unit (called a form unit) containing the form class definition and all the event handlers of the form and components placed on it |
| Unit1.xfm | The form file whose associated source code can be found in Unit1.pas. By default these files are textual, and can be edited directly, if needed. This can be controlled with a preference in the environment options dialog (New forms as text) |
| Unit1.dcu | A compiled version of Unit1.pas (Delphi compiled unit) |
| Project1.~dpr | A backup of the project file. The generation of backups is controlled by an editor option (choose Tools | Editor Options..., go to the Display page and the option is Create backup file) |
| Unit1.~pas | A backup of the form unit |
| Unit1.~xfm | A backup of the form file |
| Project1 | The resultant executable compiled from your project and associated files |
The most important files to keep are the .dpr, .pas and .xfm files, as they define the capabilities of the application. However, if you modify any settings in the project options dialog you should also consider the .kof and .conf files as important.
That completes this simple text editor project, at least for the time being. Maybe next month we can improve on it with some options, and perhaps a toolbar and status bar. Until then, happy programming!
Brian Long used to work at Borland UK, performing a number of duties including Technical Support on all the programming tools. Since leaving in 1995, Brian has spent the intervening years as a trainer, trouble-shooter and mentor focusing on the use of the C#, Delphi and C++ languages, and of the Win32 and .NET platforms. In his spare time Brian actively researches and employs strategies for the convenient identification, isolation and removal of malware.
If you need training in these areas or need solutions to problems you have with them, please get in touch or visit Brian's Web site.
Brian authored a Borland Pascal problem-solving book in 1994 and occasionally acts as a Technical Editor for Wiley (previously Sybex); he was the Technical Editor for
Mastering Delphi 7
and
Mastering Delphi 2005
and also contributed a chapter to Delphi for .NET Developer Guide
.
Brian is a regular columnist in The
Delphi Magazine and has had numerous articles published in Developer's Review,
Computing, Delphi Developer's Journal
and EXE Magazine. He was nominated for the Spirit
of Delphi 2000 award.